UNIDEN HOMEPATROL 2 SUPPORT PAGE
Most common questions, Videos, & More
HOW TO VIDEOS

In this video it will show you how to switch between and turn on and off your favorites lists in a Homepatrol 2
This video shows the difference between using the zip code feature and having the scanner preprogrammed for your County. In this video, we use two Uniden BCD436HP digital police scanners, but the same would apply to all Uniden scanners in the home patrol series line.
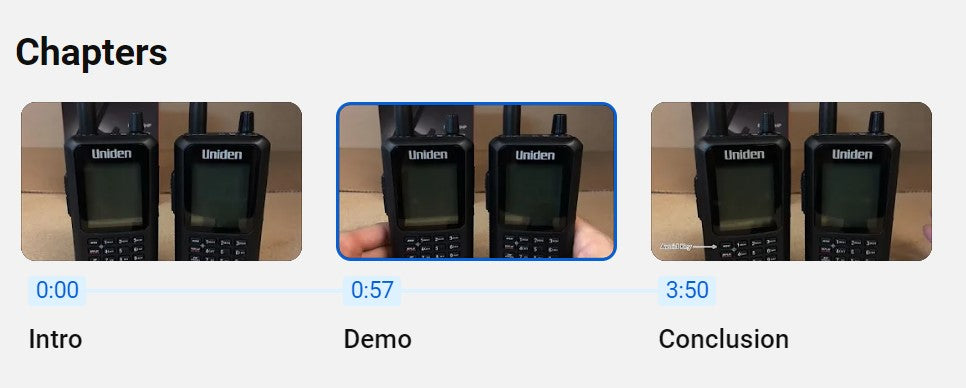
Replacing the SD card in your Homepatrol series scanner is a straightforward process. Here are the steps:
- Power Off: Please ensure your scanner is turned off before proceeding.
- Access the SD Card Slot:
- Locate the SD card slot on your scanner. It’s usually on the front or underneath the battery.
- Some scanners have a small cover that you’ll need to remove to access the slot.
- Remove the Old SD Card:
- Gently push in the existing SD card to release it.
- Carefully pull it out once it pops out slightly.
- Insert the New SD Card:
- Take your new SD card (make sure it’s compatible with your scanner) and insert it into the slot.
- Push it in until it clicks into place.
- Power On and Test:
- Turn on your scanner to ensure it recognizes the new SD card.
Regarding programming options:
- Mail-In Programming: If you prefer, you can send your scanner to Bearcat Warehouse for programming. They’ll set it up for you and send it back.
- Programmed SD Card: If your radio is compatible, you can purchase a pre-programmed SD card from Bearcat Warehouse. Just insert the card, and you’re ready to go!
Remember to consult your scanner’s manual for specific details related to SD card replacement. If you have any other questions, feel free to ask!
This is a short video that shows the process for replacing Homepatrol series SD CARDS. Here at Bearcat warehouse, we offer two methods of programming. You can send the scanner in for programming (Mail-in) or you can purchase a programmed SD CARD if you have a compatible radio.
This video quickly shows you how to find local frequencies using RadioReference. We also explain which technology is needed to listen in and how to find the desired agencies on the radio itself.


- Select the "Menu" button on the bottom left of the scanner screen
- Select "Advanced Menu"
- Select "Set Clock"
- When the numbers are blinking that means that is what you are changing currently, once you change it, it will automatically move to the next set of numbers,.
- Once you have set the Date/Time, Select "Accept" at the bottom of the screen and then hit "Listen" to go back to listening to your scanner.

The video shows how to input keys into the SDS100 but the method is basically the same for all models. For the Homepatrol model you have to use the touch screen to select the numbers or letters and you will also need to include the dash marks in between.

Frequently asked questions
How to I Turn Full database off
- Menu
- Select "Menu"
- Select "Manage Favorites Lists"
- Select "Select Database to Monitor"
- Select "Use Multiple Lists"
- Select "Full Database" if it is highlighted orange, that means that it is turned ON.
Yes, our programming was set up into favorites list so you can still use your full database when desired. After your done you would simply go in your scanner setting and turn the full database back off. Please see instructions below
- Menu
- Set Scan selection
- Select lists to monitor
- Turn full database and search with scan off
- Press the "System" key to go back to scanning
Sometimes when scanning, the scanner will receive a channel, but you can only hear static. You would need to lock this channel out to continue with normal scanning.
For BCDX36hp and SDS models
- To remove this channel double tap the “Avoid Key”.
For the HomePatrol-2
- Put the channel on hold, then tap the arrow on the righthand side, and set lockout
A police scanner is a device that receives radio frequencies used by Public Safety, while a police scanner app is a mobile app that provides access to police scanner radio feeds.
So, what this means is someone is using a scanner to broadcast the channels you hear over the internet. Typically, these "Feeds" on the app only have a couple channels or a specific area programmed.
Additionally, the apps are on a 2-minute delay, Police scanners receive in real time, so if an identical call comes over the scanner, you will hear it on the scanner first, and the app 2 minutes later. Making it impossible to compare.
If you have a scanner that is programmed for a full county for instance and the app feed your listening to only has 2 channels, the reception will also be different between them.
If you have a scanner feed you like, we recommend programming your scanner identically to that to have similar reception.
Scanners are programmed using the database listed on Radioreference.com. We program (Police, Fire, EMS & State police channels). You can put the scanner on hold to dial through all the channels to confirm these are listed in the radio.
To disable “Close call”, Press the menu button, and dial down to close call press down on the volume knob. Then dial down to “Set CC Mode”. With “Off” Selected. Press down on the Volume knob. This will disable close call.
Frequencies used by public safety are subject to change at any time, A good example is when an area transitions to a digital system from analog.
If you aren’t sure contact us
- admin@bearcatwarehouse.com
- Website Chat service
- 877-568-7226
Changes are listed on Radioreference, Each county has its own portion of the website. Chages are listed at the top of the respective county page under “Last Updated”. If there are recent changes listed for the channels your interested in re-programming is required. We offer several different programming options, you can find them isted here:
Click here for programming optionsThe SDS200 has the latest reception technology, making it the best suited to monitor all the current public safety radios systems, most specifically simulcasted radio systems. Additionally, it has a fully customizable color display, & water-resistant body style.
The zip code feature only allows for one zip code to be entered at a time, but it tells the scanner which geographic region of the frequency database to enter—it does not indicate the exact area to be scanned. For monitoring something like a tri-county area, I strongly recommend the Optimization services. They tailor the scanner to a customer's local area rather than thousands of channels based on a geographic region.
DMR, PROVOICE & NXDN are individual digital Radio systems, the manufacturer gives you the option to unlock reception of these systems with the purchase of the software upgrades
No, unfortunately. A Windows PC is required for all Uniden scanners and the software they use.
SDS100 & SDS200: It's True /Q™ receiver provides for improved digital performance in challenging RF environments.An I/Q receiver captures the complete signal waveform in 3 dimensions, allowing for improved digital error correction and signal recovery. Location-Based Scanning – Allows you to set your location by zip/postal code or GPS coordinates for instant eception.
SDS100 & SDS200
- both have IQ Scan Technology
- Same System/frequency
- Coverage Customizable
- Color display Similar reception
Benefits of the SDS100
- Water resistance Battery powered
- Portable
Benefits of the SDS200
- Larger Display
- Larger speaker
SDS100 & SDS200: It's True /Q™ receiver provides for improved digital performance in challenging RF environments.An I/Q receiver captures the complete signal waveform in 3 dimensions, allowing for improved digital error correction and signal recovery. Location-Based Scanning – Allows you to set your location by zip/postal code or GPS coordinates for instant eception.
Currently no scanners are able to monitor encrypted signals.
This range will vary based on your location, terrian, & local ransmitting towers. On average 30-50 Miles.
Unfortunately, comparing your radio to someone using Broadcastify isn’t a great comparison. Broadcastify has 2-minute delay scanners that play in real time. The end user broadcasting on Broadcastify uses a scanner with specific programming and location. Essentially, you would have to be in the same area, using the same scanner and programming, to truly compare what you have to a Broadcastify user.
Scanners aren’t Bluetooth compatible, however, we’ve had customers use 3.5MM Bluetooth adapters to sync speakers and other Bluetooth devices to the radio.
We recommend having the squelch on 2
Squelch on a Homepatrol 2
- Select "Squelch" on the top left of the scanner screen
- Select the "+" or "-" buttons to adjust the squelch
- Every yellow bar is equal to 1 squelch, we recommend having 2 yellow bars for the Homepatrol 2
Squelch/Menu Turn to adjust the squelch.
- Press to enter Menu Mode.
- Press to return one level in Menu Mode.
- Press Func then Menufor Search Menu inSearch Mode.Press Func then Menufor Close Call
- Menu in Close Call Mode. Press Func then Menu for Weather Menu in Weather Scan.
Squelch/Menu Scroll Control/Function
- Press to enter Function Mode for 3 seconds.
- Press to select a menu item or save an entry in Menu Mode.
- Turn to select a menu item in Menu Mode.
- Turn to select characters with Data Naming.
- Turn to select Scan/Search direction and to continue Scan/Search in Scan/Search Modes.
- Turn to scroll Channels or Frequencies in Hold Modes.
- Turn in Department Pause to scroll Departments.
- Turn in System Pause to scroll Systems.
- Turn in Site Pause to scroll Sites in current System.
- Turn in Search Pause to select Custom Searches to enable in Search Mode.
- Turn to select next/previous recording in Replay Mode.
- Turn to resume Close Call search in Close Call Only Mode.
- Turn to start a Quick Search in Close Call Hold Mode.
- Turn to select next Weather Channel in Weather Scan.
- Turn to select Tone-Outs in Tone-out Standby/Search Mode.
Press Menu. Scroll to WX Operation and press E/yes. Scroll to the options below and press E/yes.
- Program SAME
- Weather Scan
- Set Delay Time
- Weather Alert
- Set Attenuator
- Review WX Alerts
- WX Alt Priority
Our programming services include all towns, cities, and municipalities within the county you requested for public safety channels such as Police, Fire, EMS, and state police. The scanner does have service-type options in the radio, so they can be turned on and off when desired. So, for example, if you only wanted to hear Fire and EMS for the day, you would turn off all other service types, such as Law, and only leave the ones you want on. Also, keep in mind if there are any channels you ultimately do not like, you can permanently avoid them by double-tapping the avoid button on your scanner
1. Open your Sentinel Software

2. Click on the tools below.

3. Select you device. We are working with the SDS100. Select the correct option for your scanner
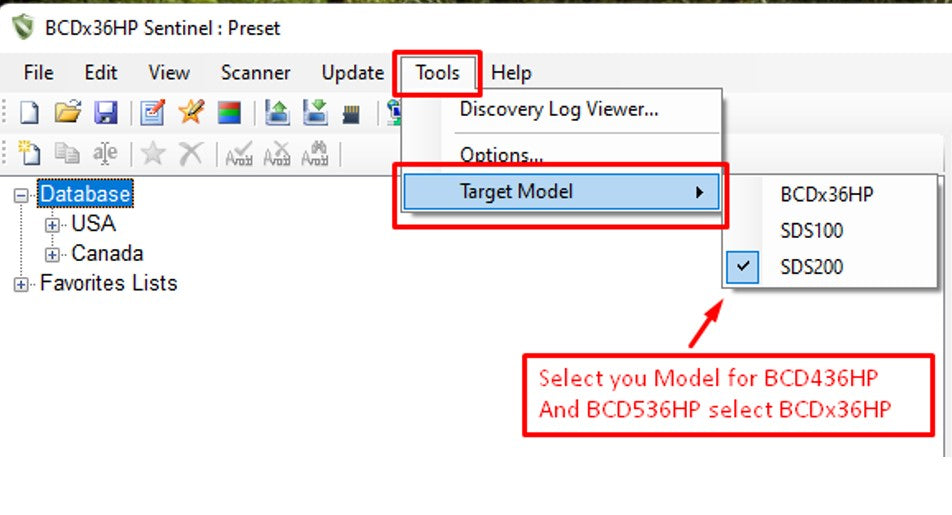
4. Under "Update" select "Update Firmware.

5. If your formatting SD card was done correctly it will automatically find your SD card. Click Ok to update.

6. Select your model then press OK.

7. The software will update your SD card.
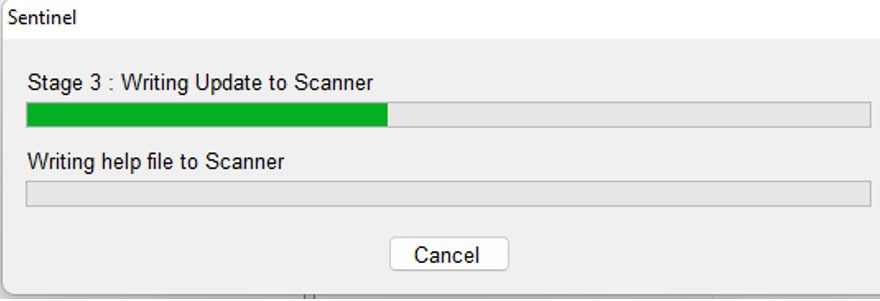
8. Click OK once more and you are done!
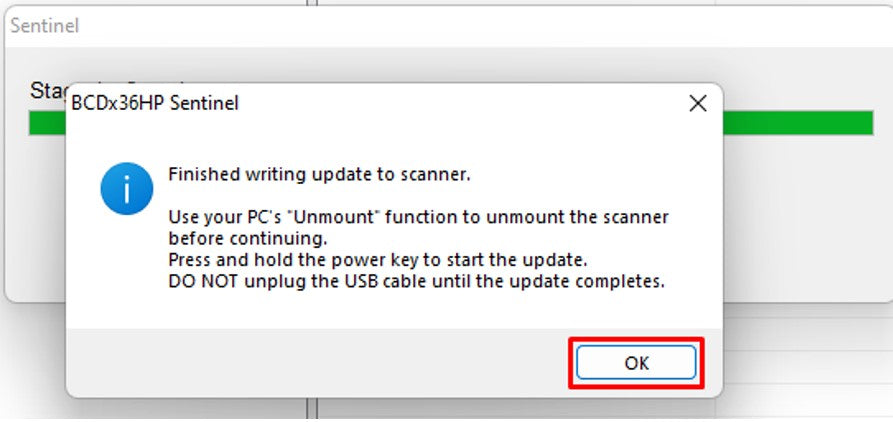
Format a New SD Card For Uniden Scanners
1. Open your Sentinel Software

2. Click "Clear User Data" to format the memory card.

3. Check the "Display All Drives" at the bottom on this screen, then OK.

4. On the next screen check OK again to format.

5.Click OK again on the warning page to erase everything on your card.

6. After it finishes click OK again.

7. Now update your firmware. Click on the tools below.

8. Select you device. We are working with the SDS100. Select the correct option for your scanner

9. Under "Update" select "Update Firmware.

10. If your formatting SD card was done correctly it will automatically find your SD card. Click Ok to update.
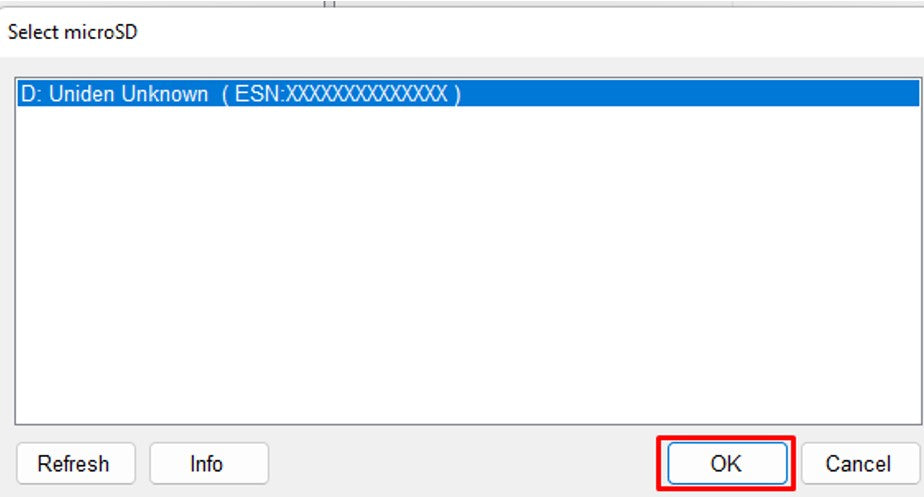
11. Select your model then press OK.

12. The software will update your SD card.

13. Click OK once more and you are done!


